RTV silicone gasket maker, often called liquid gasket, is an indispensable tool for maintenance and DIY repairs. However, improper use frequently leads to leaks and costly rework. This guide provides the complete, step-by-step process, from preparation to final curing, to ensure a successful seal the first time.
What is RTV Silicone Gasket Maker?
RTV silicone gasket maker is a single-component, paste-like silicone sealant/adhesive. It is specifically designed to form a flexible, durable gasket in place between two component surfaces.
Its working principle is Moisture Cure. It relies on moiture in the air to initiate a chemical reaction (cross-linking) that forms a skin on the applied bead. Once the parts are assembled, the material slowly cures, resulting in a resilient, rubber-like gasket. It can replace solid gaskets (in specific applications) or serve as a supplementary seal alongside them.
Key Features & Benefits of RTV Silicone Gasket Maker
1. Forms-in-Place: Silicone RTV gasket maker can perfectly fill uneven surfaces, scratches, or minor imperfections, creating a custom-fit seal.
2. Easy to Use: No need for pre-measuring or cutting solid gaskets. One tube handles multiple sizes and shapes.
3. Excellent Performance
- High & Low Temperature Resistance: Typically withstands -60°C to 250°C, with special formulas exceeding this range.
- Flexibility: Remains elastic after curing, accommodating thermal expansion/contraction and vibration.
- Chemical Resistance: Resists water, coolant, engine oil, fuel, and many chemicals.
- Strong Adhesion: Bonds effectively to metals, glass, ceramics, and most plastics.
How to Use RTV Silicone Gasket Maker
1. Preparation
(1) Safety First: Work in a well-ventilated area and wear gloves and safety glasses.
(2) Product Selection
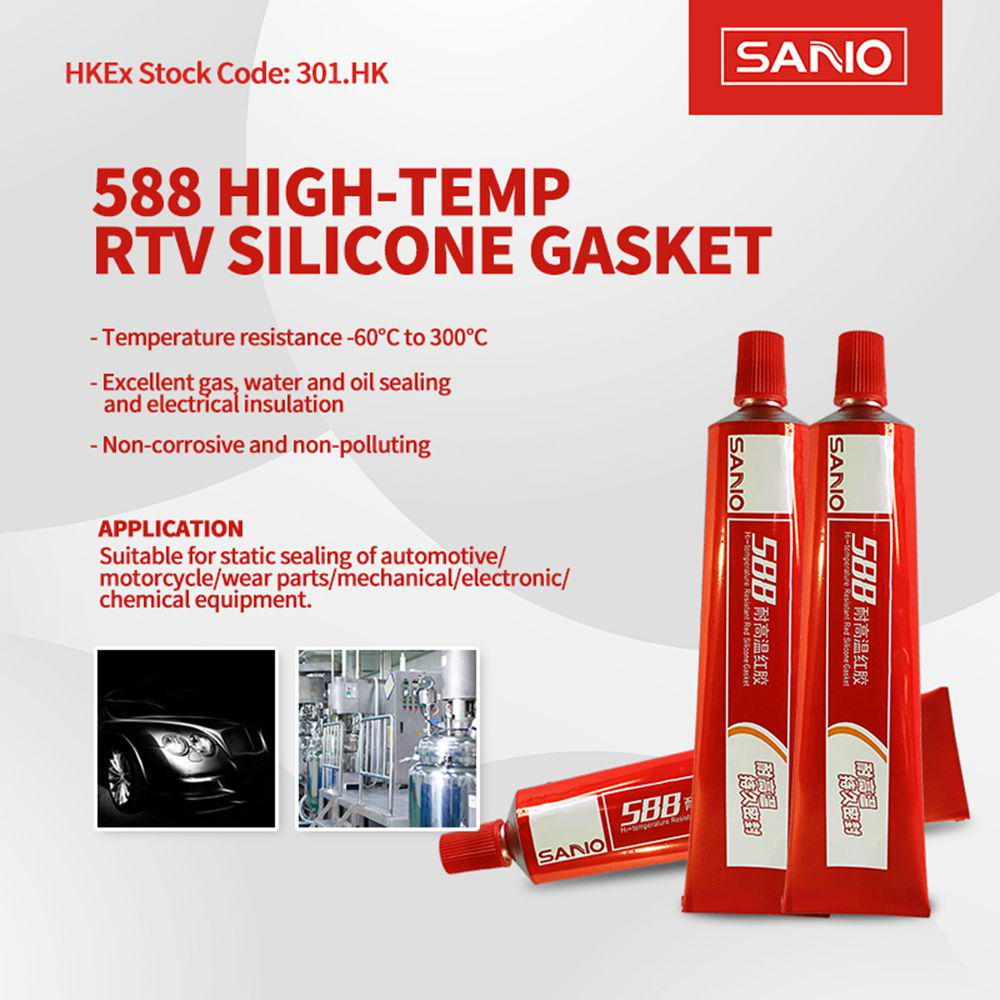
- Red: High-temperature resistance, suitable for exhaust manifolds.
- Black/Gray: General purpose, often with good oil and corrosion resistance. Ideal for engine oil pans, valve covers.
- Blue: Medium strength, allows for easier disassembly and cleanup.
Read the Label: Ensure the product is compatible with your application (e.g., resistant to engine oil, coolant, or transmission fluid).
2. Step-by-Step Instructions
Step 1: Surface Preparation
- (1) Use a scraper, razor blade, or gasket removal tool to completely remove all old gasket and sealant material.
- (2) Thoroughly clean the mating surfaces with a suitable solvent (e.g., brake cleaner) and a lint-free cloth until no residue remains. Any oil or grease will compromise adhesion!
- (3) Make sure all surfaces are completely dry before application.
Step 2: Apply the Sealant
- (1) Cut the nozzle at a 45-degree angle. The opening size determines the bead width (typically 3–5 mm is suitable).
- (2) Squeeze the tube like toothpaste to apply a continuous, even bead onto one flange surface.
- (3) The bead must be unbroken but not too thick. Circle around all bolt holes to ensure a proper seal in these critical areas.
Step 3: Initial (Finger-Tight) Assembly
- (1) While the silicone is still wet (uncured), quickly align and assemble the two components.
- (2) Hand-tighten or gently snug the bolts until the parts are seated (“finger-tight”). This evenly spreads the sealant into a thin film.
- (3) Do not yet torque to the final specification.
Step 4: Skin Formation & Final Tightening
- (1) Wait for Skin Formation: Maintain the initial assembly and wait for the silicone surface to skin over (refer to product label; typically 30 minutes to 1 hour).
- (2) Final Tightening: After skin formation, tighten the bolts to the manufacturer’s specified sequence and final torque values.
Step 5: Curing & Final Check
- (1) Let the assembly sit undisturbed until fully cured. This usually takes 24–48 hours for optimal strength. Do not add fluids or put into service prematurely.
- (2) Remove any excess squeezed-out sealant.
- (3) After adding fluids, run the equipment and carefully check for leaks.
Common Mistakes & Important Notes
❌ Insufficient surface cleaning: The leading cause of failure.
❌ Bead too thick or interrupted: Excess sealant can cause internal blockage, while gaps lead to immediate leaks.
❌ Incorrect torque application: Both over-tightening and under-tightening can cause seal failure.
❌ Insufficient curing time: Premature operation is a frequent error.
Important: Do not use standard RTV products in pure fuel or strong solvent environments.
Applications of RTV Silicone Gasket Maker
Automotive Repair & Manufacturing: Engine oil pans, valve covers, transmission housings, water pumps, thermostat housings.
Industrial Equipment: Gearboxes, compressors, pump housing seals.
Appliances: Dishwasher and washing machine pump seals.
Plumbing Systems: Auxiliary sealing for flange connections.
Wrapping-up
In conclusion, mastering the use of RTV Silicone Gasket Maker is key to achieving durable, leak-proof seals that save time and money. To ensure such professional results, using a high-quality RTV product is essential.
SANVO offers a comprehensive line of engineered products for superior performance, including fast-curing RTV, excellent oil-resistant RTV, and the durability to withstand thermal cycles without cracking, all produced with guaranteed quality materials that have earned a loyal client following.
Shop Now and Find Your Perfect Sealant!
Have questions or need expert advice? Our team is here to help!