The caulk products are messy. You see tubes labeled silicone, polyurethane, hybrid, and acrylic, all promising to be the one you need. But choosing the wrong caulking for windows and doors can lead to drafts, water damage, and a job you have to redo in six months.
That simple bead of caulk is your home’s first line of defense against rain, pests, and costly energy bills. This guide cuts through the confusion. We’ll help you choose the best caulk for exterior windows and doors for your specific project and show you how to apply it like a pro, ensuring a durable, waterproof seal that lasts.
The Best Window Sealant Caulk: Silicone vs. Polyurethane
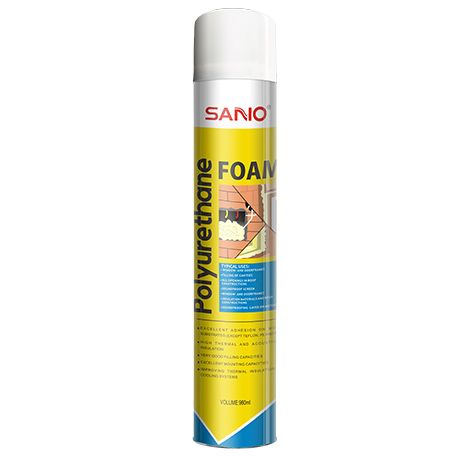
For exterior projects, you can ignore most of the options and focus on the two main champions: Silicone and Polyurethane. Your choice depends on two things: what material you’re sealing and whether you need to paint it.
| Feature | 100% Silicone Sealant | Polyurethane (PU) Sealant |
| Best For | Non-porous (smooth) surfaces: VinylAluminumFiberglassGlass | Porous (rough) surfaces: WoodBrickConcreteMasonry |
| Advantages | 100% waterproof Incredibly flexible (won’t crack) Unmatched UV & weather resistance | Extremely strong, durable bond Abrasion-resistant Tough |
| Lifespan | 20+ years | 5-10 years (painting helps extend its life) |
| Paintable? | No. Paint will peel off. You must buy a color-matched sealant. | Yes. 100% paintable for a seamless finish. |
Product Recommendation:
Sanvo’s Neutral Windows & Doors Silicone Sealant TB798
What about Hybrid Sealants?
Hybrids are a newer technology designed to be the “best of both worlds”. They often combine the UV resistance of silicone with the paintability of polyurethane. They are an excellent all-around choice but typically cost more than the other two.
Can I Use Waterproof Paint on Sealant?
This is the #1 mistake homeowners make. You apply a bead of window silicone, try to paint over it with your trim color, and a week later, it’s a peeling, ugly mess.
Here’s the science, made simple: 100% silicone is hydrophobic, which means it’s chemically designed to repel water. Since most exterior paint is water-based, the silicone literally pushes the paint away, making a bond impossible.
Do not trust online “hacks” like applying shellac primer first. The silicone is flexible, but the primer and paint are rigid. When the sealant expands or contracts with the weather, the inflexible paint on top will crack and peel every time.
The Right Solution (Choose one):
- If You MUST Paint: Do not use 100% silicone. Start with a paintable sealant like Polyurethane or a Hybrid Polymer.
- If You Want Silicone’s Durability: Do not paint it. Buy a color-matched 100% silicone sealant (SANVO offers a wide range of colors) that matches your trim from the start.
How to Caulk Outside of House: A 5-Step Pro Guide
Getting a professional result is all about the prep work. A new silicone window seal will fail if it’s applied over old, dirty, or failed caulk.
- Step 1: Complete Removal Applying new caulk over old caulk is a recipe for failure. Use a utility knife or razor scraper to carefully score both edges of the old bead. Then, use a caulk removal tool or putty knife to scrape and pull the old material out of the joint.
- Step 2: Clean the Joint This is the most important step. The new sealant needs a perfectly clean, dry surface to bond to. Scrub the joint with a rag soaked in isopropyl (rubbing) alcohol to remove all dust, oils, and residue.
- Step 3: Prep Your Tools Cut the nozzle of your SANVO caulk tube at a 45-degree angle. Make the opening just slightly smaller than the gap you need to fill. Use the metal rod on your caulk gun (or a long nail) to puncture the inner seal.
Pro-Tip: Apply painter’s tape to both sides of the joint for an exceptionally sharp, clean line.
- Step 4: Apply Steady Pressure Hold the caulk gun at a 45-degree angle to the joint. Squeeze the trigger with steady, consistent pressure and move the gun in one smooth motion. It’s better to “push” the caulk into the gap rather than “pull” it, as this forces the sealant deep into the joint.
- Step 5: Tool and Peel Immediately after applying the bead, “tool” it by running a caulk tool (or your finger) lightly over the bead. This isn’t just for looks—it presses the sealant into the joint to ensure a gap-free, waterproof bond. If you used painter’s tape, peel it off while the caulk is still wet for a perfect edge.
Quick Note on Sealing Interior Window Frames
For sealing interior window frame, you don’t need the extreme weatherproofing of silicone or polyurethane.
For this job, you want an Acrylic Latex caulk, often called “Painter’s Caulk”. It’s formulated to be easy to apply, cleans up with just water, and is designed to be painted for that professional finish between your trim and the wall.
Your Best Seal Starts Here
Choosing the right window caulk is the first and most important step to protecting your home. Remember the simple rule:
- For Unpainted, Max-Durability Sealing (Vinyl/Metal): Use 100% Silicone.
- For Painted Sealing (Wood/Brick): Use Polyurethane.
By matching the right product to your project and following the proper application steps, you can create a professional-grade seal that protects your home for years. For a seal you can trust, start with a quality product.
Explore SANVO’s complete line of sealants, from 100% Silicone to paintable PU, to find the perfect solution for your home project.