Paint bubbling (or blistering) is a frustrating problem. It’s important to know that the bubble is not a defect in the paint itself. It is a symptom of a critical failure: the paint is losing its adhesion to the wall.
This loss of adhesion, which causes the paint film to lift and fill with air or moisture, is almost always caused by one of three things: moisture, heat, or poor preparation.
The 3 Main Causes of Paint Bubbles
Before you can fix the problem, you must find the cause.
Moisture
This is the most common and destructive cause of paint blistering.
Leaks: Water from a leaky roof, a faulty pipe, or bad exterior caulking can get behind the drywall. This water then pushes the paint film off the surface from the inside out. If your bubble feels soft or is water-filled, you likely have an active leak.
High Humidity: This is common in bathrooms, kitchens, and basements. Steam from hot showers or cooking condenses on the walls. This moisture can weaken the paint’s bond over time, especially if the wrong type of paint was used or the area isn’t well-ventilated.
Painting on a Damp Surface: If you paint over a wall that is already damp, you trap that moisture. As the water tries to evaporate, it creates vapor pressure and pushes the new paint into a bubble.
Heat (Painting in Direct Sunlight)
Heat is a major cause of bubbles that appear during or shortly after application.
“Skinning” Mechanism: Painting on a surface that is too hot (like an exterior wall in direct, hot sunlight) causes the “top paint coat” to dry almost instantly. This creates a “skin” of dried paint, trapping the wet paint and solvents underneath. These trapped solvents expand, creating blisters.
Poor Surface Preparation
The paint is only as strong as the surface it’s sticking to.
Contamination: This is a very common error. If you paint over a surface that is “dirty,” “damp,” or “greasy,” the paint can’t form a strong bond. The new paint adheres to the layer of grime, not the wall itself, making it easy for it to fail.
Skipping Primer: Primer is essential on new, porous surfaces like drywall or spackle patches. Without a primer to “seal” the substrate, the paint cannot achieve a proper bond and may bubble or peel easily.
Old Paint Failure: Sometimes, the fault isn’t with your new paint, but the old paint underneath. If the original paint was applied to an unprimed wall, it has a weak bond. The moisture from your new coat of latex paint can soak through and weaken that old, poor bond, causing the old layer to bubble and peel, taking your new paint with it.
How to Fix Bubbling Paint (A Permanent Repair)
A repair will only be permanent if you fix the root cause first. Blindly scraping and repainting will result in the bubbles returning.
Step 0: Identify and Fix the Root Cause
This is the most common and destructive cause of paint blistering.
If you have moisture: Fix the roof leak, repair the plumbing , or install (and use) an exhaust fan in the bathroom.
If you have contamination: Ensure the area is properly cleaned and (in a kitchen) that a range hood is vented properly.
How to tell the cause of the Paint Bubbling?
If it peels down to the bare drywall or plaster, your problem is almost certainly moisture or a total primer failure.
If it peels off and reveals a shiny, old layer of paint, your problem is likely contamination (grease) or incompatibility (like oil painted over latex).
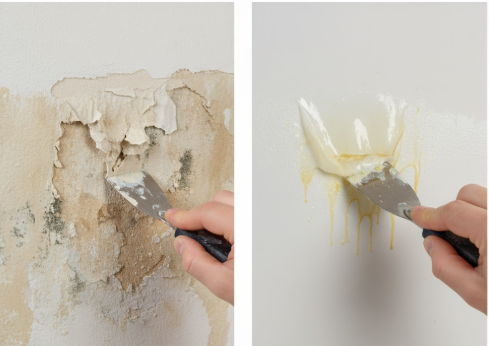
Step 1: Scrape and Sand
Once the cause is fixed, use a paint scraper to “remove” all blisters, bubbles, and “loose paint”. You must scrape back to a “sound” (well-adhered) surface. Then, “sand the surface to smooth out any rough edges”.
Step 2: Clean and Dry
After scraping and sanding, you must clean the entire area. This removes dust and any remaining contaminants. Use “soap and water” or a stronger degreaser like Tri-Sodium Phosphate (TSP) if you suspect grease. The surface must be allowed to dry completely before proceeding.
Step 3: Patch (If Needed)
If scraping left gouges, fill them with “spackle” or “joint compound” to create a “smooth finish”. Let it dry, then sand it smooth.
Step 4: Prime (This is Non-Negotiable)
Priming is essential to ensure the new paint bonds correctly.
Warning*
“Paint-and-primer-in-one” products are generally not sufficient for this type of repair. You need a dedicated, function-specific primer.
For water stains: You must use a stain-blocking primer (oil-based or shellac-based) to lock in the stain and prevent it from bleeding through your new paint.
For peeling/adhesion issues: Use a bonding primer. This type of primer is engineered to act as a “glue” that locks down the edges of the old paint and creates a stable foundation.
Step 5: Repaint
Once the primer has fully cured, apply a “quality acrylic latex interior paint”.
Apply in thin, even coats.
Allow “sufficient drying time between coats” (usually at least four hours).
For high-moisture areas like bathrooms, use a “special bathroom paint” designed for high-humidity environments.