That $2.3 billion Toyota recall in 2019? Paint delamination on 3.4 million vehicles. The Ford warranty extension affecting 1.5 million trucks? Coating adhesion failure. The luxury brand reputation crisis that took five years to recover from? You guessed it—paint performance issues that could have been caught in the car paint testing in the lab.
As a testing engineer, you know the stakes. One missed defect equals thousands of warranty claims, regulatory investigations, and customers who’ll never trust your brand again. The difference between career-making success and catastrophic failure often comes down to how well you execute paint performance testing.
This comprehensive guide addresses the most pressing challenges faced by automotive testing professionals worldwide. You’ll gain practical expertise in standard selection, sample preparation, test execution, and result interpretation that directly translates to improved product quality and reduced testing inefficiencies.
Essential Standards & Principles for Testing Cars’ Paint
Navigating the complex landscape of car paint testing standards requires understanding both global frameworks and regional requirements. The three primary standard organizations—ASTM International, ISO, and national standards like GB—each contribute essential methodologies to comprehensive testing programs.
| Standard | Test Focus | Application | Key Advantage |
| ASTM D3359 | Adhesion | Cross-cut & pull-off methods | Rapid production assessment + quantitative data |
| ASTM D3363 | Hardness | Pencil hardness test | Simple, reproducible for QC checkpoints |
| ASTM B117 | Corrosion | Salt spray testing | Foundation for automotive corrosion testing |
| ISO 2409 | Adhesion | Cross-cut test | Global standard with different blade specs |
| ISO 12944 | Corrosion Protection | Steel structure coatings | Comprehensive system approach |
| ISO 4628 | Coating Degradation | Evaluation methods | Standardized terminology worldwide |
ASTM Paint Adhesion Testing Standards
Adhesion test for paint (ASTM) provides the most extensive collection of paint testing methods, with over 150 standards specifically addressing coating performance. Key automotive-relevant standards include:
ASTM D3359 (Standard Test Methods for Rating Adhesion of Coatings) offers both cross-cut and pull-off methods for adhesion evaluation. The cross-cut method, using either X-cut or lattice patterns, provides rapid assessment suitable for production environments, while pull-off testing delivers quantitative data essential for engineering decisions.
ASTM D3363 (Standard Test Method for Film Hardness by Pencil Test) establishes pencil hardness testing protocols widely accepted throughout the automotive industry. This method’s simplicity and reproducibility make it ideal for incoming material verification and quality control checkpoints.
ASTM B117 (Standard Practice for Operating Salt Spray Testing Apparatus) defines neutral salt spray testing conditions that simulate marine and road salt environments. While not specific to automotive applications, this standard forms the foundation for more specialized automotive corrosion testing.
ISO Standards: Global Harmonization
ISO standards facilitate international trade by providing universally accepted test methods. Critical car paint testing standards include:
ISO 2409 (Paints and Varnishes – Cross-cut Test) closely parallels ASTM D3359 but includes subtle differences in blade specifications and evaluation criteria that can significantly impact results when switching between standards.
ISO 12944 (Paints and Varnishes – Corrosion Protection of Steel Structures) provides comprehensive guidance for protective coating systems, including environmental categorization and performance requirements highly relevant to automotive applications.
ISO 4628 (Paints and Varnishes – Evaluation of Degradation of Coatings) establishes standardized terminology and evaluation methods for coating deterioration, enabling consistent communication of test results across global organizations.
National Standards: Regional Requirements
Many countries maintain national standards addressing specific local conditions or regulatory requirements. China’s GB standards, Europe’s EN standards, and Japan’s JIS standards often incorporate unique test conditions or acceptance criteria reflecting regional climate, regulatory, or market preferences.
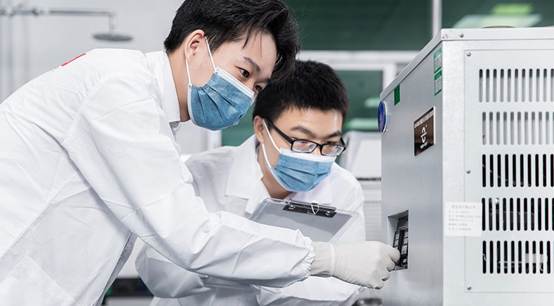
Four Test Principles
Adhesion Testing Fundamentals
Adhesion testing evaluates the interfacial bond strength between coating layers or between coating and substrate. Cross-cut testing creates a grid pattern of cuts through the coating, then applies standardized tape to assess coating removal. The amount of coating removed indicates adhesion quality on a scale from 0 (excellent) to 5 (poor).
Pull-off testing applies perpendicular tensile force through dollies bonded to the coating surface. This quantitative method provides specific adhesion strength values (typically in MPa or psi) essential for engineering calculations and specification development.
Hardness Testing Principles
Pencil hardness testing draws calibrated pencils of increasing hardness across the coating surface at standardized angles and pressures. The hardest pencil that doesn’t scratch the coating indicates the film’s hardness rating, ranging from 6B (very soft) to 9H (very hard).
Pendulum hardness testing measures the coating’s resistance to deformation by timing the decay of an oscillating pendulum in contact with the surface. This method provides quantitative hardness values correlating with abrasion resistance and durability.
Corrosion Testing Mechanisms
Salt spray testing exposes coated panels to continuous salt fog at controlled temperature and humidity conditions. The test accelerates corrosion processes, with coating breakdown typically occurring 100-1000 times faster than natural exposure.
Cyclic corrosion testing alternates between salt spray, humidity, and dry conditions to more accurately simulate real-world exposure patterns. These tests often correlate better with field performance than continuous salt spray exposure.
Weathering Test Principles
Accelerated weathering exposes coated samples to controlled UV radiation, temperature, and moisture cycles. Xenon arc lamps most closely simulate natural sunlight’s spectral distribution, while UV fluorescent lamps provide more aggressive UV exposure for accelerated testing.
Temperature and humidity cycling simulates thermal expansion/contraction and moisture absorption/desorption that stress coating systems in service. These conditions often reveal adhesion problems not apparent under constant conditions.
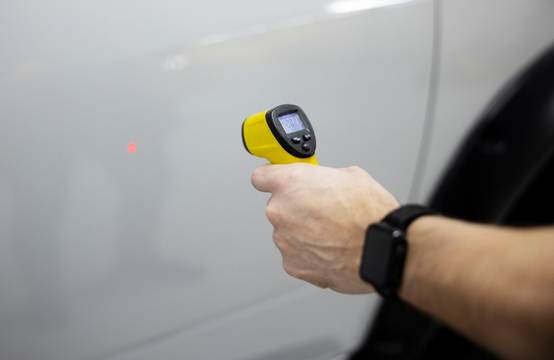
Sample Preparation & Test Execution
Accurate test results depend fundamentally on proper sample preparation and meticulous test execution. Variations in substrate preparation, coating application, or curing conditions can dramatically affect results, making standardized procedures essential for reliable data.
Sample Preparation: The Foundation of Reliable Testing
Substrate Selection and Preparation
The choice of substrate significantly influences coating performance and test results. Steel panels (typically cold-rolled steel or electrogalvanized steel) represent the most common automotive substrate, while aluminum and plastic substrates require specialized preparation techniques.
For steel substrates, surface preparation begins with degreasing using appropriate solvents (typically isopropyl alcohol or acetone) followed by light abrasion using 320-400 grit sandpaper. This process removes surface contaminants and creates mechanical anchoring points for improved adhesion.
Aluminum substrates require different preparation due to their natural oxide layer. Chemical etching or specialized primer systems ensure adequate coating adhesion. Plastic substrates often need flame treatment, corona discharge, or chemical etching to achieve sufficient surface energy for coating wetting.
Coating Application Standardization
Consistent coating application ensures test result reproducibility and relevance to production conditions. Spray application using calibrated spray guns at controlled distance, pressure, and speed provides the most representative coating characteristics.
Film thickness control is critical for meaningful results. Automotive coatings typically require total system thickness of 80-120 micrometers, applied in multiple coats (primer, basecoat, clearcoat) with specified flash times between applications.
Environmental conditions during application significantly affect coating properties. Temperature (20-25°C), humidity (45-55% RH), and air circulation must be controlled to ensure proper solvent evaporation and coating flow.
Curing and Conditioning Protocols
Proper curing ensures complete coating development and representative performance characteristics. Most automotive coatings require elevated temperature curing (typically 80-160°C for 20-30 minutes) followed by ambient conditioning.
Conditioning periods allow coating properties to stabilize before testing. Most standards specify 24-48 hours conditioning at standard laboratory conditions (23°C, 50% RH) before testing begins.
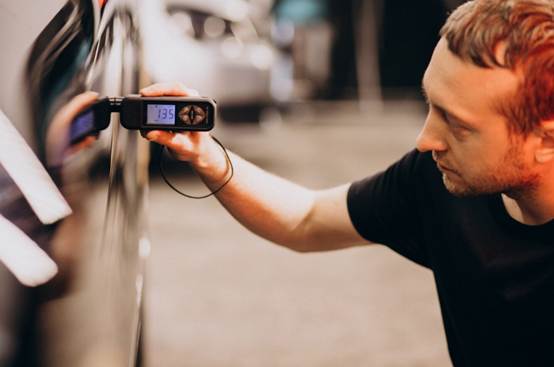
Core Test Execution Procedures
Adhesion Testing (Cross-Cut Method)
The cross-cut test requires precise execution to generate reliable, repeatable results:
1. Tool Selection: Use cutting guides with properly spaced teeth (1mm for coatings <60μm, 2mm for coatings 60-120μm, 3mm for coatings >120μm)
2. Cutting Technique: Apply uniform pressure while drawing the cutting tool across the surface at a steady speed. Cuts should penetrate through the coating to the substrate without gouging the substrate.
3. Grid Pattern: Create two sets of parallel cuts perpendicular to each other, forming a grid of squares. Ensure cuts are straight and evenly spaced.
4. Tape Application: Apply standardized pressure-sensitive tape (specified in the test standard) over the grid, smoothing to eliminate air bubbles. Apply tape within 2 minutes of cutting to prevent coating relaxation.
5. Tape Removal: Remove tape by pulling at 180° angle at a steady rate (approximately 1 second per cm of tape length).
6. Evaluation: Compare the cut area with standard photographic scales to assign adhesion ratings from 0 (best) to 5 (worst).
Hardness Testing (Pencil Method)
Pencil hardness testing requires careful attention to pencil preparation and testing technique:
1. Pencil Preparation: Sharpen pencils to expose 5-6mm of lead, then sand the tip on 400-grit paper held at 90° to create a flat, circular tip.
2. Test Execution: Hold the pencil at 45° to the surface and push away from yourself with firm, uniform pressure. The stroke should be 6-7mm long.
3. Evaluation: The hardest pencil that doesn’t scratch the coating indicates the film hardness. Perform at least 5 tests per hardness level to ensure consistent results.
Salt Spray Testing
Salt spray testing requires careful attention to solution preparation and chamber conditions:
1. Solution Preparation: Prepare 5% sodium chloride solution using distilled water and reagent-grade salt. Solution pH should be 6.5-7.2.
2. Sample Positioning: Mount samples at 15-30° from vertical to promote drainage while preventing dripping between samples.
3. Chamber Conditions: Maintain temperature at 35±2°C with continuous spray creating 1-2ml/hour collection rate per 80cm² horizontal surface.
4. Evaluation Schedule: Inspect samples at specified intervals (typically 24, 48, 72, 96, and 168 hours) documenting any changes in coating appearance.
Weathering Testing (Xenon Arc)
Accelerated weathering testing simulates years of outdoor exposure in controlled laboratory conditions:
1. Lamp Selection: Use xenon arc lamps with appropriate filters to simulate desired radiation spectrum (daylight, window glass, etc.).
2. Exposure Cycle: Program appropriate light/dark and wet/dry cycles. Common automotive cycles include 102 minutes light (0.35 W/m²/nm at 340nm) followed by 18 minutes light with water spray.
3. Temperature Control: Maintain black panel temperature at 65±3°C during light periods and cabinet temperature at 38±3°C during dark periods.
4. Evaluation: Assess color change, gloss retention, and coating integrity at regular intervals (typically every 250-500 hours exposure).
[Watch Our Expert Video Series]
Decoding Test Results: Interpretation & Troubleshooting
Transforming raw test data into actionable insights requires deep understanding of result interpretation, statistical analysis, and systematic troubleshooting approaches. This section provides the analytical framework necessary to extract maximum value from your testing investment.
Data Interpretation Fundamentals
1. Quantitative vs. Qualitative Results
Car paint testing generates both numerical data (pull-off adhesion strength, gloss measurements, color coordinates) and observational assessments (cross-cut adhesion ratings, visual deterioration evaluations). Effective interpretation requires understanding the strengths and limitations of each data type.
Quantitative results provide precise, statistically analyzable data ideal for specification development, trend analysis, and comparative studies. However, these measurements may not capture all aspects of performance relevant to end-use applications.
Qualitative assessments often correlate better with field performance and customer perception but require trained evaluators and standardized assessment procedures to ensure consistency and reproducibility.
2. Statistical Analysis and Confidence Intervals
Proper statistical analysis distinguishes between random variation and significant performance differences. Calculate mean values, standard deviations, and confidence intervals for quantitative measurements to establish statistical significance.
For adhesion testing, report both individual measurements and statistical summaries. A pull-off adhesion result of “2.1 ± 0.3 MPa (95% confidence interval, n=10)” provides far more useful information than simply “2.1 MPa.”
Qualitative results require different statistical approaches. For cross-cut adhesion ratings, report the distribution of ratings observed rather than attempting to calculate meaningless averages. “8 of 10 samples rated 1, 2 samples rated 2” provides clear performance characterization.
3. Pass/Fail Criteria and Specification Development
Establish clear acceptance criteria based on performance requirements rather than arbitrary limits. Consider both minimum performance thresholds and practical manufacturing variability when setting specifications.
Adhesion specifications should account for test method variability and substrate effects. A specification requiring “cross-cut adhesion rating ≤ 2” provides clear pass/fail criteria, while “minimum 95% of cut squares remaining” offers more precise control.
Systematic Troubleshooting Approaches
l Poor Adhesion Performance: Adhesion failures typically result from surface contamination, inadequate surface preparation, coating incompatibility, or improper curing conditions.
l Substrate-Related Issues: Oil, grease, fingerprints, or oxide layers prevent proper coating adhesion. Verify cleaning procedures and consider more aggressive surface preparation methods.
l Coating Thickness Effects: Excessive coating thickness can cause internal stress and adhesion failure, while insufficient thickness may not provide adequate mechanical interlocking.
l Curing Problems: Under-cured coatings exhibit poor cohesive strength, while over-cured coatings may become brittle and prone to adhesion failure.
l Environmental Factors: High humidity during application can cause coating defects, while low temperature may prevent proper curing and adhesion development.
l Insufficient Hardness Development: Hardness problems often indicate curing deficiencies, coating formulation issues, or contamination problems.
l Curing Temperature and Time: Verify actual coating temperature during curing using calibrated thermocouples. Inadequate curing temperature or time prevents complete crosslinking and hardness development.
l Solvent Retention: Rapid curing may trap solvents, preventing complete hardness development. Extend flash times or reduce curing rate to allow proper solvent evaporation.
l Contamination Effects: Silicone contamination can significantly reduce coating hardness and should be investigated if hardness problems occur despite proper curing conditions.
l Accelerated Corrosion Failure: Premature corrosion in salt spray testing often indicates coating defects, inadequate barrier properties, or substrate preparation problems.
l Coating Defects: Pinhole defects, inadequate thickness, or poor adhesion create pathways for corrosive attack. Examine failed samples under magnification to identify defect patterns.
l Edge Effects: Coating damage at cut edges can dominate test results and mask coating performance. Consider edge sealing for more representative testing.
l Substrate Preparation: Inadequate surface preparation can create weak interfacial bonds that fail under corrosive attack. Verify surface preparation procedures and consider more aggressive treatments.
l Accelerated Weathering Degradation: Poor weathering performance may result from inadequate UV protection, thermal instability, or moisture sensitivity.
l UV Degradation: Rapid color change or gloss loss indicates inadequate UV protection. Consider UV absorber additions or coating reformulation.
l Thermal Effects: Coating degradation at elevated temperatures suggests thermal instability. Verify actual coating temperatures during testing and consider heat-resistant formulations.
l Moisture Sensitivity: Coatings that perform well in dry conditions but fail in humid environments may have moisture-sensitive components requiring reformulation.
Advanced Troubleshooting Techniques
l Failure Analysis Methods: Systematic failure analysis identifies root causes and prevents recurring problems. Optical microscopy reveals coating defects, delamination patterns, and substrate conditions. Scanning electron microscopy (SEM) provides detailed surface morphology information, while energy dispersive spectroscopy (EDS) identifies contamination sources.
l Comparative Testing Strategies: Design experiments to isolate variables and identify root causes. Compare suspect coatings with known good references under identical conditions. Vary single parameters (substrate preparation, curing conditions, coating thickness) while holding others constant to identify critical factors.
l Statistical Process Control: Implement control charts to monitor test result trends and identify process shifts before they affect product quality. Establish control limits based on historical data and investigate any results outside these limits.

Experiencing Unexpected Test Results?
Schedule a FREE Technical Consultation with Our Laboratory Experts!
Optimizing Your Lab: Equipment, Calibration & Best Practices
Laboratory excellence demands more than proper test execution—it requires systematic equipment management, environmental control, and continuous improvement practices that ensure long-term testing reliability and efficiency.
Equipment Selection and Management
l Critical Equipment Categories: Car paint testing laboratories require specialized equipment for each performance characteristic evaluated. Adhesion testing equipment ranges from simple cross-cut tools to sophisticated pull-off testers with digital force measurement and data logging capabilities.
l Cross-Cut Adhesion Tools: Professional-grade cutting guides with carbide or diamond-tipped blades provide consistent cut quality and extended service life. Adjustable cutting guides accommodate different coating thicknesses and substrate materials.
l Pull-Off Adhesion Testers: Hydraulic or pneumatic testers offer precise force control and digital readouts essential for quantitative adhesion measurement. Consider testers with data logging capabilities for automated record keeping and statistical analysis.
l Hardness Testing Equipment: Pencil hardness testing requires minimal equipment but demands high-quality pencils and proper sharpening techniques. Automated pencil hardness testers eliminate operator variability and provide more consistent results.
l Corrosion Testing Chambers: Salt spray chambers must maintain precise temperature, humidity, and solution chemistry control. Features like automated solution replenishment, pH monitoring, and programmable cycling capabilities enhance testing efficiency and reliability.
l Weather Testing Equipment: Xenon arc weatherometers provide the most accurate simulation of natural sunlight but require significant capital investment. UV fluorescent testers offer lower cost alternatives for accelerated testing programs.
Calibration and Maintenance Protocols
l Calibration Management Systems: Implement comprehensive calibration programs ensuring all measurement equipment maintains accuracy and traceability to national standards. Develop calibration schedules based on equipment usage, stability, and criticality to test results.
l Temperature and Humidity Control: Calibrate environmental monitoring equipment quarterly using NIST-traceable standards. Document calibration results and maintain calibration certificates for quality system compliance.
l Force Measurement Devices: Calibrate pull-off adhesion testers annually using certified reference loads. Verify linearity across the full measurement range and document any deviations requiring correction factors.
l Optical Measurement Systems: Calibrate colorimeters and glossmeters using certified reference standards. Verify measurement repeatability and accuracy across the full measurement range.
l Preventive Maintenance Programs: Establish systematic maintenance schedules preventing equipment failures and ensuring consistent performance. Document all maintenance activities and track equipment reliability metrics.
l Salt Spray Chamber Maintenance: Weekly cleaning of chamber interiors prevents salt buildup that can affect spray distribution and temperature control. Monthly verification of spray rate and solution chemistry ensures test condition accuracy.
l Weatherometer Maintenance: Regular lamp replacement prevents spectral drift that affects test results. Monitor lamp output using calibrated radiometers and replace lamps before output falls below acceptable limits.
Environmental Control and Laboratory Design
l Laboratory Environmental Conditions: Maintain laboratory temperature at 23±2°C and relative humidity at 50±5% for optimal test conditions and equipment performance. Install HVAC systems with sufficient capacity to handle heat loads from curing ovens and weathering equipment.
l Air Quality Management: Install appropriate ventilation systems to remove solvent vapors and maintain safe working conditions. Consider air filtration systems to minimize dust contamination during sample preparation and testing.
l Lighting Considerations: Provide uniform, color-corrected lighting for visual evaluations. Install UV-filtered windows to prevent inadvertent sample exposure during storage and handling.
l Laboratory Layout Optimization: Design laboratory workflows to minimize sample handling and contamination risks. Separate sample preparation areas from testing areas to prevent cross-contamination. Provide adequate storage for samples, standards, and test materials.

Data Management and Quality Systems
Laboratory Information Management Systems (LIMS)
Implement LIMS to manage sample tracking, test scheduling, and data management. Automated data collection reduces transcription errors and improves testing efficiency.
Statistical Process Control
Monitor test result trends using control charts and statistical analysis. Establish control limits based on historical data and investigate any results outside these limits. Implement corrective actions to maintain process control.
Traceability and Documentation
Maintain complete records of all testing activities including sample preparation, test conditions, and results. Ensure traceability from raw materials through final test reports. Implement electronic signatures and audit trails for regulatory compliance.
Personnel Training and Certification
Develop comprehensive training programs ensuring all personnel understand proper testing procedures, safety requirements, and quality system requirements. Implement competency assessments and ongoing training to maintain skills.
Quality Assurance Programs
Participate in interlaboratory comparison programs to verify test method accuracy and precision. Implement proficiency testing programs and investigate any unsatisfactory results.
Conclusion
The automotive industry’s relentless pursuit of quality, durability, and customer satisfaction demands excellence in every aspect of paint performance testing. Throughout this comprehensive guide, we’ve explored the critical elements that transform routine laboratory testing into a strategic competitive advantage.
Precision in car paint testing extends far beyond simple compliance with specifications—it enables innovation, reduces costs, and builds customer confidence. The methodologies, troubleshooting strategies, and best practices outlined in this guide provide the foundation for laboratory excellence that directly impacts your organization’s success.
Ready to Transform Your Testing Capabilities?
Get Your Personalized Testing Consultation – Connect with our technical experts to develop a customized testing strategy for your specific needs!
Reference:
https://img.nbchao.com/upload/2018/11/1543589563579.pdf
sanvo
